
Herb & Buttermilk Brined Turkey
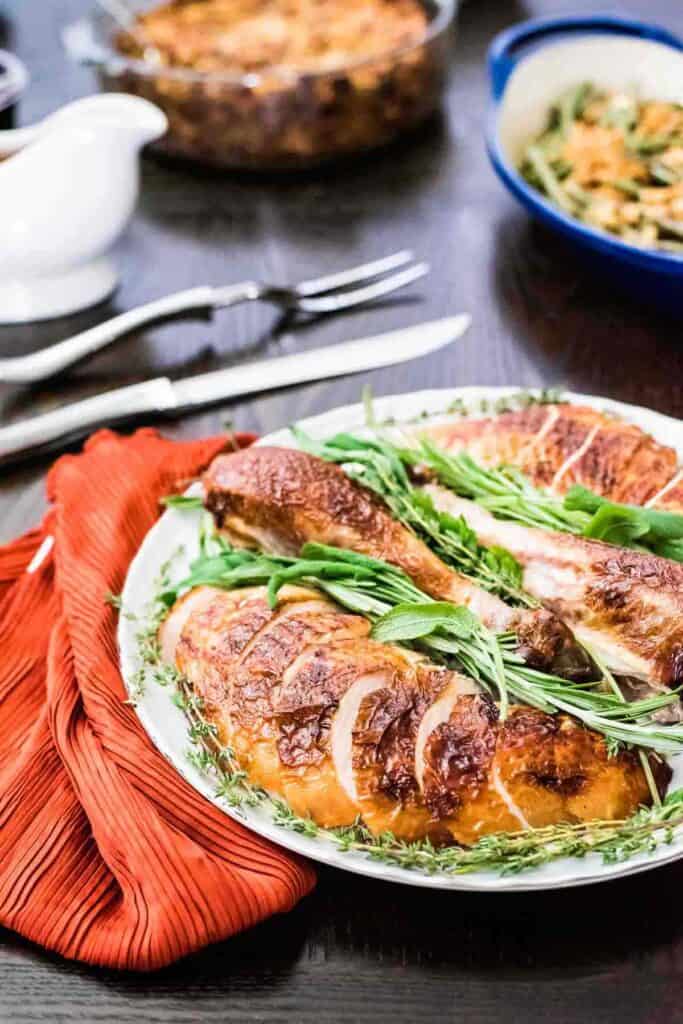
Buttermilk brined turkey brings together the plump juicy texture of brined turkey with the tang of buttermilk and an infusion of rosemary, thyme, and sage. It’s a simple approach to making a delicious Thanksgiving turkey that you will want to come back to year after year.
Note: It does take 24 – 48 hours to brine after your turkey is thawed, so don’t forget to plan ahead!

A Turkey Brine Built on Buttermilk and Herbs
While a classically brined turkey is soaked in a mixture of kosher salt, sugar, and water to add moisture, this buttermilk-brined turkey takes it one step further, leveraging the acid of the buttermilk and herbs to add flavor. The end result is a tender, juicy turkey, with all the traditional flavors of the Thanksgiving table.
Worried that a brined turkey means extra work on the day that matters most? It doesn’t. The brine does the heavy lifting two days ahead of time, so by Thanksgiving morning all that’s left is roasting. Inspired by Samin Nosrat’s buttermilk marinated roast chicken from Salt, Fat, Acid, Heat, this recipe takes her basic buttermilk brine and infuses it with sage, rosemary, and thyme, so the turkey is seasoned through and through, not just on the skin.
Plan Ahead
A great turkey dinner starts with a great plan. Here is my Thanksgiving turkey roasting plan based on a 14 pound frozen turkey, with 48 hour brine, optional 2 hour dry out, roasting, and resting, with a goal of eating at 2pm. Start here and adjust as needed.
Thawing a 14 pound frozen turkey takes 3 – 4 days and it must be thawed before brining. So, move the turkey from freezer to fridge 6 days before roasting. For Thanksgiving, I’ll move my turkey to the fridge around 2pm the Friday before the holiday. If your turkey is larger, it may need more time, while a smaller turkey may need less time. Full details for fridge thawing plus two quicker methods are covered here: Three ways to safely thaw a turkey.
This brine recipe calls for soaking 24 – 48 hours, but for the sake of this timeline, we want to max it out at 48 hours. For Thanksgiving, I’m going to start my brine at 8am on Tuesday.
Drying the turkey is important for crispy skin. You can choose to do this just prior to roasting, removing it from the brine and patting dry both inside and out with paper towels, or you can choose to do it two to three hours earlier and let the turkey continue to dry out, uncovered, in the fridge. For Thanksgiving, I’ll be drying my turkey at 8am on Thursday.
My 14 pound turkey should take about 3 1/2 hours to roast, and still needs time to rest before being carved or presented at the table. For Thanksgiving, my turkey will go in the oven at 10am on Thursday.
If all goes well, I expect to pull my turkey out of the oven 30 minutes prior to meal time. This gives it at least 15 minutes to rest before carving in the kitchen. For Thanksgiving, I’ll be pulling my turkey from the oven at 1:30pm and carving around 1:50pm on Thursday.
What You’ll Need for Buttermilk Brined Turkey
This buttermilk-brined turkey starts with a fresh or thawed frozen turkey. I aim for 14 pounds, but this recipe works for most 13 – 15 pound turkeys.
Most standard grocery store turkeys are already injected with a light saline solution (typically around 3% – 8%), and that’s not a problem here because brining works through osmosis. The salt and flavor in this brine (about 5%) balance out with what’s already in the turkey, effectively replacing that plain solution with the buttermilk, herbs, and aromatics in this recipe. The exception is kosher turkeys: they’re salted more heavily throughout during processing, not just lightly injected, so brining one again risks an oversalted bird. Stick with a standard fresh or frozen turkey for this recipe.
You will also need buttermilk, thyme, rosemary, sage, kosher salt, whole peppercorns, bay leaves, and cold water for the brine, plus garlic and onion to place inside the turkey before roasting.
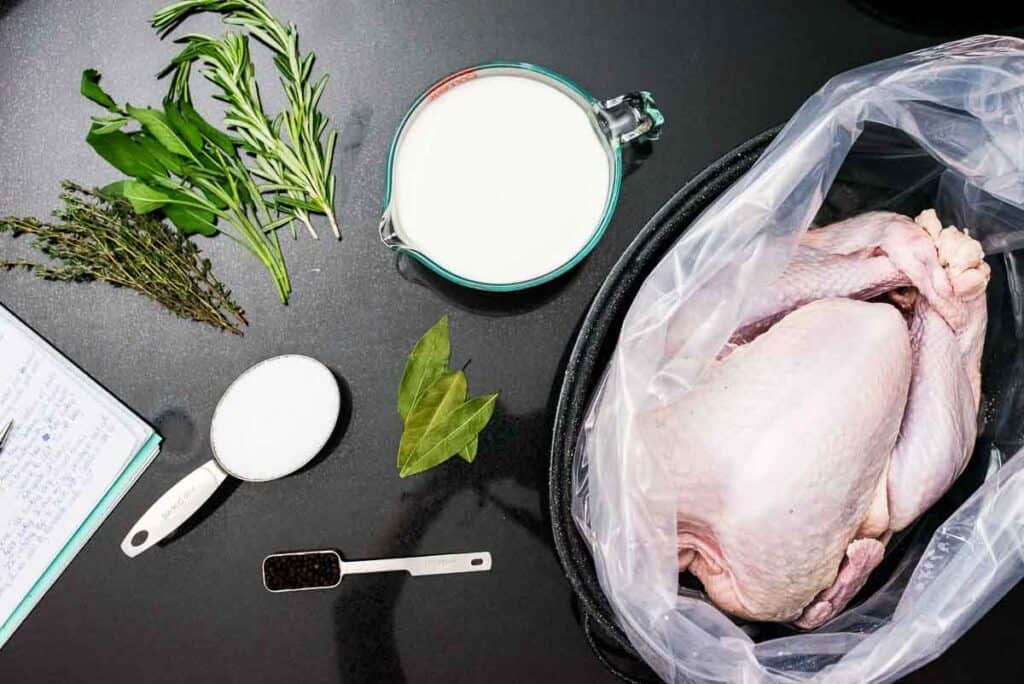
Why Buttermilk?
Buttermilk’s lactic acid is milder than vinegar or citrus, so it works into the turkey slowly without breaking down the muscle fibers to the point of mushiness. As the turkey brines, the acid and salt work together: salt draws moisture into the meat and helps the muscle proteins hold onto it, while the acid gently loosens the protein structure so the meat stays tender through a long roast. The result is a turkey that’s had time to season and tenderize from the inside out, not just on the surface.
How to Make an Herb & Buttermilk Brined Turkey
The easiest way to approach this turkey recipe is to break it down into three major sections: making the brine, brining the turkey, roasting the turkey.
Making the Herb-Infused Buttermilk Brine
We start this turkey recipe by building our herb-infused buttermilk brine, which is kind of like making a very large cup of tea.
- Start by dissolving the salt in boiling water. Combine salt and 1 quart of water in a large lidded stockpot then bring to a boil, stirring to dissolve the salt.
- Infuse the brine with herbs. Add the herbs, bay leaves, and peppercorns. Cover the pot and let it steep for 5 minutes. Like when making tea, the residual heat from the boiling water will draw out all the flavors from our aromatics, giving us a salty, spiced, herbal blend.
- Cool the brine. Now that the flavors from the herbs are in the water, we need to cool it off before adding the buttermilk. Add an additional 1 quart of cold water and allow the brew to cool uncovered for about 5 – 10 minutes.
- Measure the buttermilk, as we will add it in the next step.
Brining a Thanksgiving Turkey
Once your brine is prepared, the next step is to combine the herbal brine and buttermilk together with the turkey. Use caution though, as food safety is very important when handling raw poultry.
- Set up the brining container. Line a large container with a turkey brining bag and place the turkey in the bag. (Yes, I’m recommending a single-use plastic bag for the brine, as it’s a lot of hassle to do it without.) I like to use my roasting pan as it fits neatly in my fridge, but a large cooler or a 5 gallon bucket work as well.
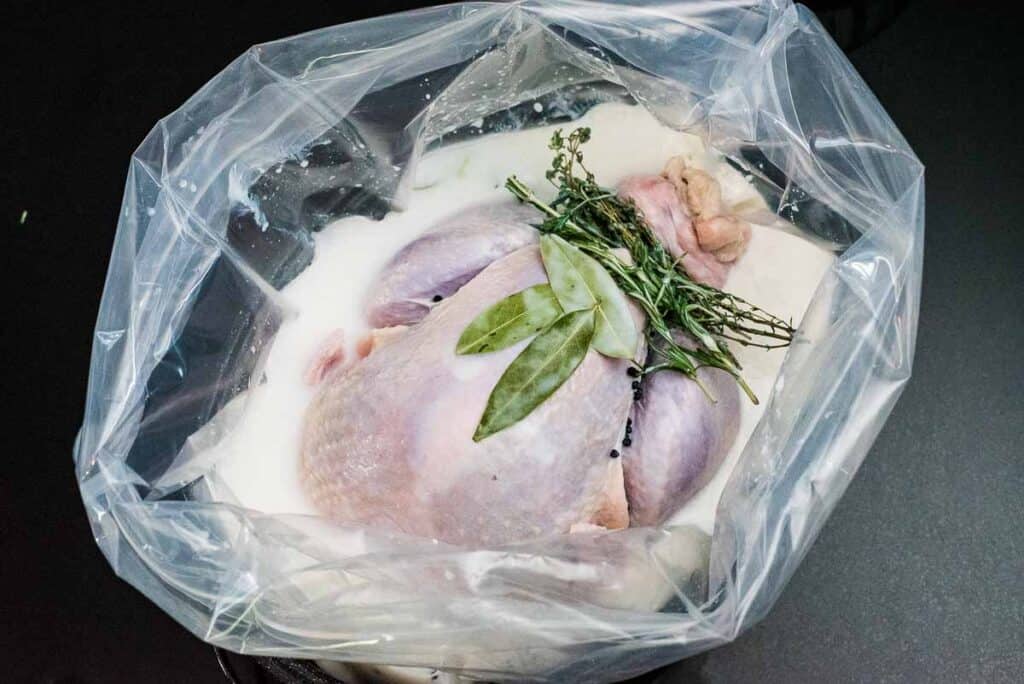
Add the brining ingredients. Pour buttermilk, brine solution, and remaining cold water into the bag with your turkey. Use caution to prevent splashing raw turkey brine around your kitchen. 
Securely close the brining bag. Using a brining bag, allows you to pull the liquid in tight around the bird, ensuring that every surface is submerged in the brine. Here I used the carton from my buttermilk to create less space in my pan and lift the liquid level for better coverage. Place the whole thing in the refrigerator for 24 – 48 hours.
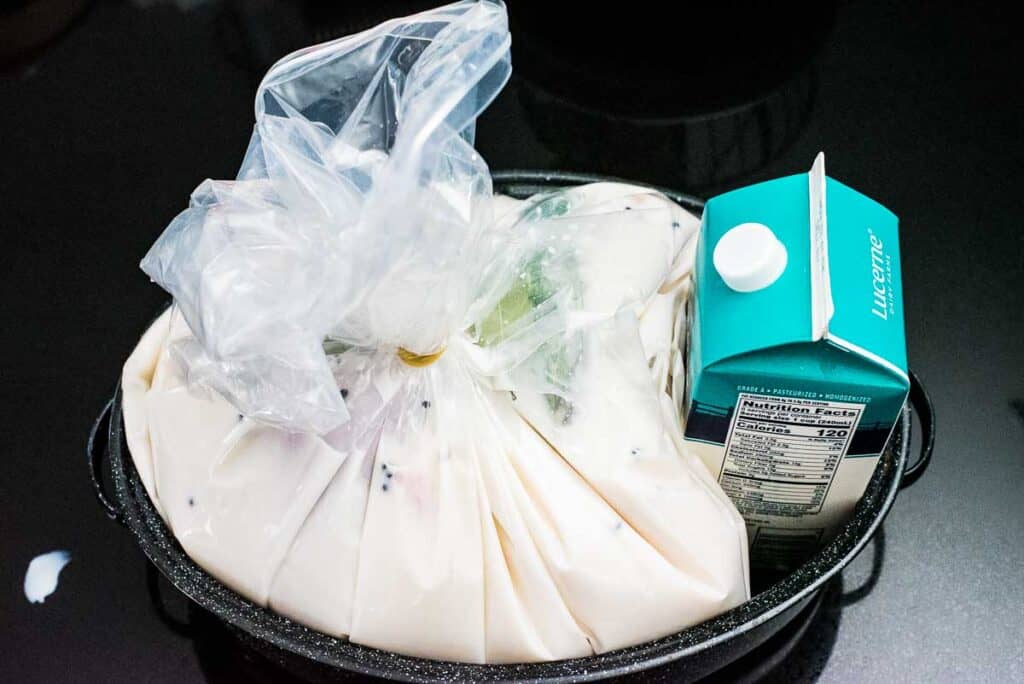
Roasting a Thanksgiving Turkey
Once your turkey has absorbed all those delicious flavors, it’s time to start roasting. Times will vary by bird size and oven, but the chart at the bottom of this section is a great starting guideline for gauging how early you need to get the bird in the oven. Using an in-oven meat thermometer can save you some stress, but I always double check it with an instant-read thermometer before I declare the turkey done.
- Remove the turkey from the brine, discard brine and brining bag, then pat the turkey completely dry with paper towels. The dryer the skin now, the crispier it gets in the oven. You can pat down the turkey and put it directly into the oven now, or for extra crispy skin let the turkey dry out uncovered in the fridge for a couple of hours before roasting.
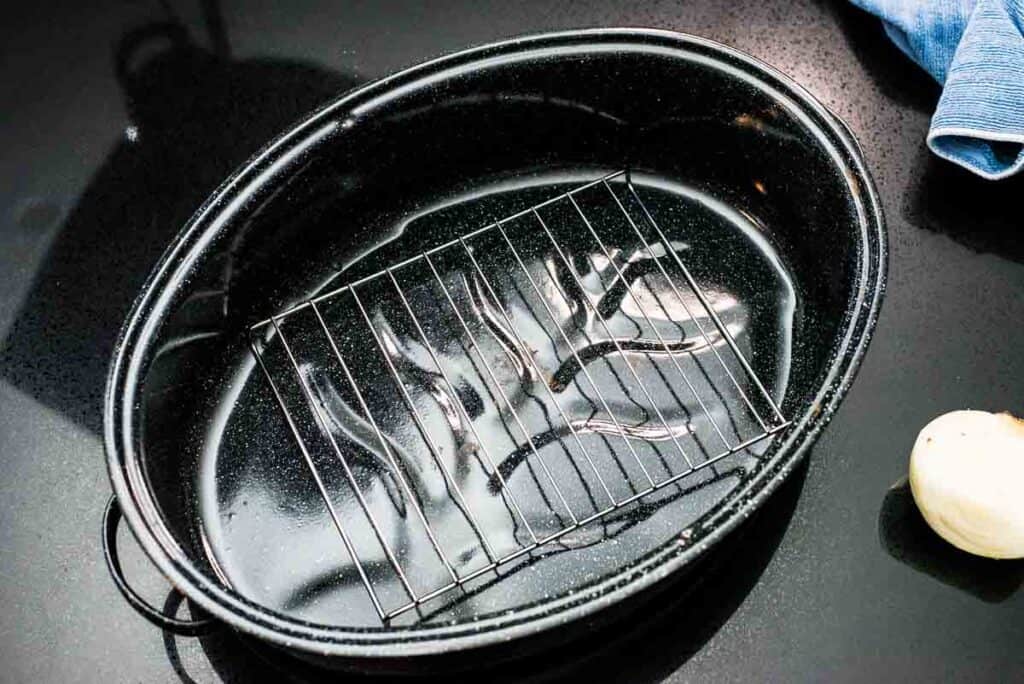
- Prep the turkey for roasting. Transfer the turkey to a heavy roasting pan, breast side up. Roughly chop the onion and cut the garlic in half to expose all the cloves, then place the aromatics in the turkey cavity. Preheat the oven to 400ºF, adjusting the oven racks if needed to get the turkey centered vertically.
- Roast the turkey. Place the uncovered turkey in the center of the hot oven with the legs pointing to a back corner.
- Rotate the turkey. Switch the position of the turkey legs (one back corner then the other) to encourage even cooking and avoid burning, then drop the heat to 325ºF to continue cooking. Continue rotating the leg position about every 30 minutes to achieve even browning.
- Check the internal temperature. The turkey is done when an instant read thermometer registers 180ºF in the thickest part of the thigh and 165ºF in the deepest part of the breast. If the skin starts getting too dark, cover the turkey either with the roasting pan lid (if you have one) or a tented piece of aluminium foil.
- Rest the turkey. Remove turkey from the oven, cover to retain heat, then allow it to sit in a warm location to rest 15 minutes or more before carving.
Estimated Turkey Cook Time
Turkey cook time is based on weight. Set oven temperature to 400ºF for the first 30 minutes, then drop the oven to 325ºF. Use a probe thermometer to verify the turkey has reached 180ºF in the thickest part of the thigh and 165ºF in the deepest part of the breast before letting it rest. All cook times based on an unstuffed bird.
|
Weight |
Estimated Roast Time |
|---|---|
|
18 pounds |
4 hours |
|
16 pounds |
3 hours 45 minutes |
|
14 pounds |
3 hours 30 minutes |
|
12 pounds |
2 hours 45 minutes |
|
8 pounds |
2 hours 30 minutes |
Tips for Turkey Success
Whether this is your first attempt at brining and roasting a turkey or you’ve been doing it for years, here are a few of my favorite tips for getting it done right.
- Cool the brine completely. Hot water is necessary to melt the salt and infuse the herbs, but adding a raw turkey to warm brine is a recipe for a food safety disaster. Even room temperature is too warm. Cool the brine completely then add the rest of the cold water and the cold buttermilk.
- Keep the whole turkey submerged in the brine and keep it cold. No fridge space? Use a large cooler. Place large reusable ice packs in the bottom of the cooler. Place the bagged, brining turkey on top and cover with more ice, preferably cubes that can melt. Check every 4 – 6 hours, draining the melted ice and adding more as necessary.
- The onion and garlic don’t count as stuffing. The cook time chart above is based on an unstuffed bird, and the aromatics in the turkey cavity are there for flavor, not bulk as they don’t pack the cavity or slow cooking the way a traditional bread stuffing does. If you want to add real stuffing, plan for extra time in the oven and check both the turkey’s temperature and stuffing temperature separately before pulling it.

Serving Suggestions
This buttermilk brined turkey will be the shining star of your Thanksgiving table, but that doesn’t mean it should stand alone. At my house, that means all the traditional fixings, from sides to dessert, which you can see for yourself in Your Ultimate Thanksgiving Menu Planning Guide. If I had to choose a favorite, it would probably be my garlicky green beans with fried onions, a lightened up version of green bean casserole free from mushrooms and canned soup. Looking for something a little less expected? You can’t go wrong with these gorgeous roasted root vegetables.
How to Store and Reheat Buttermilk Brined Turkey
Cooked turkey can be refrigerated in air tight containers for 3 – 5 days. It can also be frozen for longer storage. Leftover turkey makes for good sandwiches, but it makes for great turkey soup, turkey tacos, or turkey pot pie. Eat it cold, or reheat small portions in the microwave or larger portions in the oven.

Herb & Buttermilk Brined Turkey
Ingredients
- 13 – 15 pound turkey (innards removed)
Brine
- 3 quarts cold water (divided)
- 1 cup coarse kosher salt (240 grams, Morton brand)
- 1 tablespoon black peppercorns
- 3 – 4 sprigs fresh thyme
- 2 – 3 sprigs fresh sage
- 2 – 3 sprigs fresh rosemary
- 4 bay leaves
- 2 quarts buttermilk
Aromatics
- 1 medium yellow onion
- 1 head garlic
Instructions
- In a 3 quart or larger saucepan bring 1 quart of water and 1 cup of salt to a boil, stirring to dissolve salt. Once salt is dissolved remove pan from heat and stir in 1 tablespoon black peppercorns, 3 – 4 sprigs fresh thyme, 2 – 3 sprigs fresh sage, 2 – 3 sprigs fresh rosemary, 4 bay leaves. Cover and allow to steep 5 minutes. Uncover, add 1 additional quart of cold water and allow to cool 5 minutes more.
- Prepare the turkey by lining a large container with a turkey brining bag. A large roasting pan, stock pot, or 5 gallon bucket works well. Place the turkey inside the bag, add 2 quarts of cold buttermilk, the last quart of cold water, and the salty herbal infusion. Secure the top of the bag and squish to combine the brine together and coat the turkey. Make sure the turkey is covered with the brine. Refrigerate for at least 24 hours or up to 48 hours.
- Adjust the oven racks so that the turkey can sit in the center of the oven. Depending on the size of the turkey, you'll need to use the lowest or second to lowest rack placement, removing additional racks as necessary. Preheat oven to 400º.
- Remove the turkey from the brine, discarding the herbs, peppercorns, and liquid brine. Pat the turkey dry with paper towels and place breast side up in a large roasting pan lined with a rack. Cut onion into quarters, cut garlic in half, place both inside the turkey cavity.
- Place the turkey in the oven, with the breast centered and the legs pointing towards the back right of the oven. Roast 30 minutes, then rotate the legs to the back left of the oven, keeping the breast centered, and reduce the oven temperature to 325º.
- Continue to rotate the legs from left to right every 30 minutes until a meat thermometer in thickest part of the thigh reads 180º, the breast meat reads 165º, and the skin is crispy and golden brown. For a 14 lb turkey, it should take about 3 – 3 1/2 hours total roasting time.
- Remove turkey from oven, cover and allow to rest 15 minutes or more before carving.
We are a participant in the Amazon Services LLC Associates Program. As an Amazon Associate I earn from qualifying purchases. Check out my Amazon shop to see all of my recommended kitchen tools.
Notes
Nutrition
Nutrition information is automatically calculated and is for general information purposes only. For the most accurate information, calculate using your select brands and exact measurements.
Like this recipe?
If you made this recipe, please leave a star rating along with a comment below — it helps other readers know what they are getting into before they start. (Five stars is the best!)
I have used this brine recipe for several years.the one thing I do different is. I put it in a roasting bag and cook for 1 hour at 400deg. Then cook at 220deg for several hours. You don’t have to carve it. It falls off the bone. Very tender and delicious 😋
Hello, I’m very excited to try this recipe for my turkey this Thanksgiving. My turkey is 20 pounds. How should I modify my brine to accommodate a larger bird? Also, do I need to baste ? If so how often? Thanks so much!
You don’t need to baste with this method. As far as adjustments for the brine, I would recommend increasing it by 25% to ensure you have enough brine to fully submerge the larger turkey. For the aromatics, I would increase them from medium size to large size. For the remaining ingredients I’ve done the math for you. Hope this helps!!
Brine
3.75 quarts cold water (divided)
1 1/4 cups (301 grams) coarse kosher salt salt
1 tablespoon plus 3/4 teaspoon black peppercorns
4 – 5 sprigs fresh thyme
2 1/2 – 3 3/4 sprigs fresh sage
2 1/2 – 3 3/4 sprigs fresh rosemary
5 bay leaves
2 1/2 quarts buttermilk
Aromatics
1 large yellow onion
1 large head of garlic
Thank you so much! That was very helpful! I’ll post again after the big day and let you know how it went over. Thank so much for replying.
The most beautiful turkey I’ve ever made. Thanks so much for adjusting the amounts for me. Best turkey ever!
This buttermilk brined turkey recipe is a game-changer for Thanksgiving! The herbs and buttermilk really make a difference. Thanks for sharing this amazing recipe
You’re welcome Jhicel! It makes such a delicious turkey.
Will there be juices in the pan after roasting for gravy?
Yes! There should be plenty of juices left for gravy!
How much salt should you add to the brine if the turkey is prebrined?
Hi Zoe! I have not tested this recipe with a pre-brined turkey, so I cannot guarantee the results. I have done some digging on brining a pre-brined turkey and for every response that says don’t do it, there is another one that says it’s fine. Without knowing the solution levels in your turkey I can’t give you an exact answer, but I’m 90% certain that I would say use the salt. Here is why:
Brining helps a turkey to retain moisture and add flavor by achieving equilibrium between the turkey and the brining solution. The salt goes from an area of high concentration (the brine) into an area of low concentration (the turkey). The solution in this recipe is around 5%, while most pre-brined turkeys use a solution between 5% – 8% (that’s the solution, not the salt percentage in the turkey.) Brining it again in a solution at an equal or lower salt percentage should not substantially increase the total salt volume in the final product.
If I were in your shoes I would use the salt as it’s listed in the recipe. The exception would be is if there are people in your group that are salt sensitive or prefer a reduced salt diet. If that is the case, I would reduce the salt by half giving you a 2.5% brine solution.
I would think that the salt may be more magnified in the drippings or the homemade stock. If that’s the case, use no-salt added broth to thin the gravy and if you are making it homemade, don’t add salt to the stock until after it’s done cooking.
Whatever you choose to do, please report back and let me know how it turns out!
Happy Thanksgiving!
Renee